I am working in a team at Telefónica where we frequently prototype with voice, audio and sound. This opens a wide range of experiences that you can create or enrich. To achieve this, it is often necessary to manipulate, transform, and experiment with recorded, processed, or played audio signals. Advanced audio processing requires working with signals without compression or modifications to maintain maximum fidelity in the captured data.
This article shows how to capture raw audio in Android with Kotlin with focus on the most important variables, terms and concepts involved on the process.
Project repository and structure
The examples are based on an attached repository that you can find at the end of the article. The main files that you should know are:
- AudioRecorder: Responsible for capturing the audio.
- RecorderViewModel: Intermediary between logic and interface.
- RecorderScreen: It defines the user interface
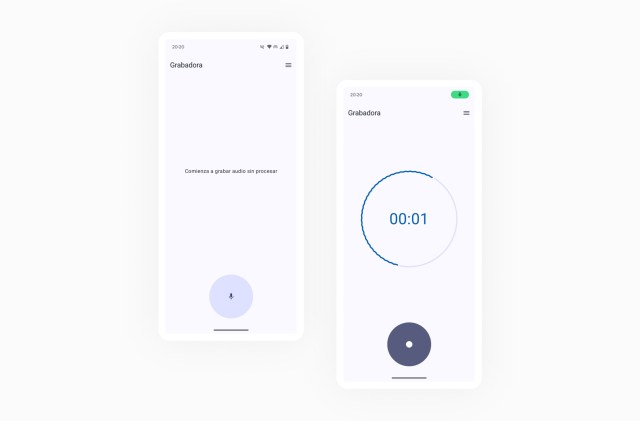
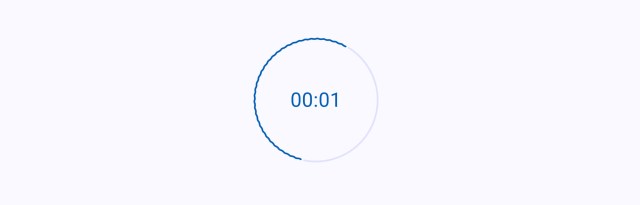
(Example app that you will find in the repository)
Remember to add recording permissions to your AndroidManifest.xml and ask the user for them or activate them manually from your app’s settings.
<uses-permission android:name="android.permission.RECORD_AUDIO" />Raw audio settings and features
The examples are based on capturing audio data from a speech source. We’ll see how the data is captured correctly, then we’ll generate a file that saves the audio data, and finally we’ll see how to send it to a server. All while maintaining the raw format of the signal.
First it is essential to configure some recording parameters:
- Sample Rate: (Hz) Defines the number of samples taken per second. A frequency of 16000 Hz, suitable for the human voice will be used.
- Channels: Indicates how many samples are recorded at each instant of time. We will use a single channel (Mono), which implies a single sample.
- Encoding Format: PCM format, uncompressed, with a resolution of 16 bits per sample (Each sample occupies 2 bytes in memory).
As you have seen, the parameters must be adapted to the source we want to study. You can see more information about it in this article from Hugging Face.
We’ll create an object to make it easier to reuse these parameters in different parts of the project.
object AudioConfig {
	const val SAMPLE_RATE_HZ = 16000
	const val CHANNELS = Audio.CHANNEL_IN_MONO
	const val AUDIO_ENCODING = Audio.ENCODING_PCM_16BIT
}
Initialization of AudioRecord for raw audio capture
In Android, AudioRecord is the best option for working with raw audio, rather than MediaRecord. Although there is greater complexity in having to manually control parameters and behavior, it allows for low-level access and manipulation of audio data.
In addition to the parameters described above, to create the AudioRecord, an audio source and buffer size should be added.
audioRecord = AudioRecord(
	MediaRecorder.AudioSource.DEFAULT,
	AudioConfig.SAMPLE_RATE_HZ,
	AudioConfig.CHANNELS,
	AudioConfig.AUDIO_ENCODING,
	bufferSize
)
Audio buffer and latency management
The buffer works as an intermediate container in which audio samples will be temporarily stored until read. These samples will be replaced by other samples and read again progressively. As you have seen, we need the buffer size data to initialize the recorder.
Working with real-time audio, a small buffer will allow for lower latency and fast processing but configuring a smaller buffer than the one supported by the device can lead to problems of information loss, as there is not enough time to process and read the audio samples.
We can calculate the byte capacity of the minimum buffer for the correct creation of the AudioRecorder, for each specific device, using getMinBufferSize(). Calculate it before creating the AudioRecord instance, so that you can configure it properly.
getMinBufferSize(int sampleRateInHz, int channelConfig, int audioFormat)Here are the values obtained for the buffer capacity on two different devices.
- Pixel 6: With a capacity of 640 bytes, 320 samples of 2 bytes.
- Samsung S23: 1280 bytes which is equivalent to 640 samples of 2 bytes.
This shows that we get a different minimum buffer capacity value for two different devices, with the same parameters. Later, when you get audio samples, you can try setting up a much smaller buffer and see how information is lost in the final audio file.
Thread execution and priority for real-time audio
We must consider that the operation of writing and reading data cannot block the application interface, so it must be assigned to a new thread, which we also give a special priority, compared to operations that may occur simultaneously.
Process.setThreadPriority(Process.THREAD_PRIORITY_AUDIO)Life cycle and overall operation of the recorder
Here are the available functions in the recorder:
- create(): Includes the calculus of the minimum buffer and initialization of the AudioRecord.
- play(): To start recording on the thread reserved for it and store and read the information captured by the recorder in the buffer.
- stop(): It stops recording and frees up resources
IsRecording.value = false
audioRecord?.stop()
audioRecord?.release()
recordingThread = null
audioRecord = null
Reading and validating audio data
First, we’ll do a quick check that the data is correctly filling the buffer. Print a log of the first bytes present in the buffer converted to a String for that.
while (isRecording.value) {
	val numberRead = audioRecord!!.read(audioBuffer, 0, audioBuffer.size)
	if (numberRead > 0) {
		val dataLog = audioBuffer.take(numberRead).joinToString()
		Log.d(LOGO TAG, "Audio data (bytes): $dataLog")
	}
}
You will be able to see how values between -128 and 127 are printed in an array in the terminal. Each number corresponds to an audio sample = 2 bytes = 16 bits (e.g. 0010100010101011), as we had indicated in the initial configuration.
Saving PCM audio to internal memory
Now we can take it a step further and save the audio data in a .pcm audio file progressively. An easy way to do this is to save this file to the device’s internal memory.
private var audioFile: File? = null
private var fileOutputStream: FileOutputStream? = null
Before starting the recording, we will define the file in which we will write the audio bytes.
audioFile = File(context.filesDir, “recording_test.pcm”)
FileOutputStream = FileOutputStream(audioFile)
FileOutputStream class allows to write into the file as we receive new data.
fileOutputStream?.write(audioBuffer, 0, numberRead)Remember to properly close the file after the recording is complete.
fileOutputStream?.close()
fileOutputStream = null
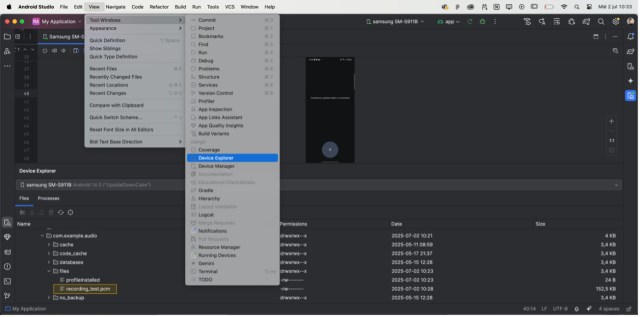
You can find the file saved in your device’s internal memory in Android Studio from the Device Explorer view.
.pcm files contain raw audio and therefore it is not possible to read them with common audio players. Use instead an advanced audio program such as Audacity or convert it to a format such as .mp3 or .wav.
Now that you know the basics, you can start exploring countless applications involving raw audio analysis or transformation. It will make a difference so that you can be a craftsman, manipulating, transforming and adapting sound to create unique experiences. Check the attached repository to see the code referenced in the examples.